Thursday, February 16, 2012

Things to Make: A Snail Birthday!


As promised, here are a few pics of the Snail-themed Birthday Party I planned for my six-year-old daughter.

I know.

Snails.

Really.


Anyway...

We had a lot of fun playing some silly snail games like "Slug, Slug, Snail" (which is basically my made up version of "Duck, Duck, Goose," modified so that they have to go slowly...and crawl instead of run!).

We also had a "Snail Race!"  All of the kids colored their very own snail and wrote their name on the back.

You can find this cute little snail clipart HERE.
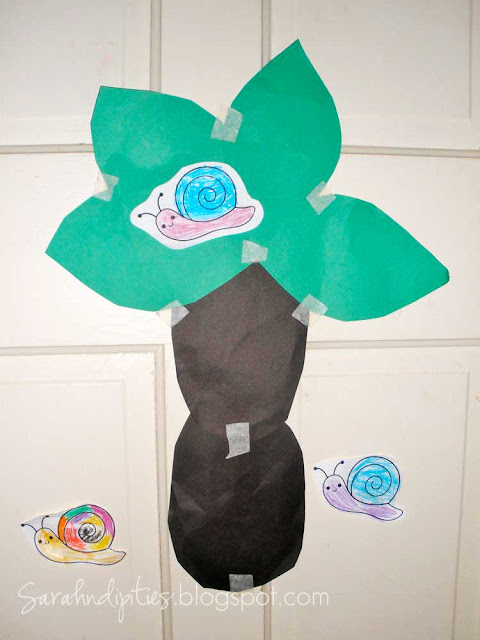
I set up a "path" for them to follow from the living room to the dining room, where a Snail Feast awaited them.  The path was made of green construction paper leaves, black paper rocks, and blue paper puddles taped to the floor.  Each child took turns rolling a dice, and moving along the path according to the number on the dice.  If they landed on a rock or puddle they had to wait another turn (because it's tricky for snails to get around rocks and puddles, you know).

After the party my daughter turned the rocks and leaves into a tree on the door! :)
When each snail reached the table they got a little Fruit by the Foot roll, and some "mud" - ie chocolate pudding - to dig in.  We also added some gummy snails to the mud to make it fun!

Sorry for the crumby picture...for some reason it was really hard to get a pic of the gummy snails in the mud! ;)
When everyone finally got to the table we ate our Snail Feast!

There were Snail Shell crackers:  These are just swirls of Easy Cheese on Ritz crackers!  A big hit! ;)


Sweet and Savory Snail Roll-ups:  The sweet ones are tortillas spread with peanut butter, cream cheese and apple-cinnamon jam.  The savory ones are tortillas spread with cream cheese, avocados, and deli turkey.  You just roll them up and cut them into little pinwheels!

Sweet Snail Roll-ups!
Savory Snail Roll-ups!
And finally Hot Snail Dogs:  These are hot Dog wrapped in Crescent Roll dough.  Then we added little chow mein noodle eye stem thingies.  The serving platter was drizzled with honey to make the "snail slime trails."  I got the idea for these on Pinterest, here.  Aren't they cute?  (And sort of disgusting?  There's no accounting for taste.)

Hot Snail Dogs! 
See the little snail trails? Tee hee!
After our meal we opened present and then it was time for cake!!

The dirt on the cake is made from crushed up chocolate sandwich cookies (like Oreos), with the squishy white stuff removed.  (I saved that stuff for another part of the cake!)  The grass is made from coconut tinted green with food coloring.  Rocks and flowers are made from jumbo gumdrops...the flowers have lemon drop centers.


The snails are my favorite part!  Their bodies are made from the white Oreo filling...I just kinda rolled it into little snake/slug shapes!  The snails shells are made from Hershey's kisses with the tops chopped off...and then swirled with edible writing gel.  The little eye stems are those chow mein noodles again!

All in all it was a great party!  I'm just glad I was able to make a snail-themed party work!  I mean, whose kid ask for a snail-themed party?

Oh, right.

Mine.  :)


Tuesday, February 14, 2012

Things to Make: Felt Happy Heart Pin


THIS TUTORIAL HAS BEEN MOVED TO MY NEW SITE, SARAHNDIPITIES.COM!

CLICK THE LINK BELOW TO GO TO THE TUTORIAL!


I also shared this fun little tutorial over at BeccaWilhite.com!

Wednesday, February 8, 2012

Guest Posting at BeccaWilhite.com!


I'm sharing this happy little heart pin tutorial over at BeccaWilhite.com this week!  Becca is my super talented Sister-in-law.  Not only is she beautiful, but she's also hilarious.  And she's an author.  Of REAL books!  So. Cool.

Go check out her site...she's doing LOTS of great stuff this month...and giving fun stuff away!!

I'll be giving away the cute little pin shown above...along with this fabulous set of six notecards during the giveaway she's having this week!!


Really!  The giveaway ends on Friday Night! Go check it out...

Tuesday, February 7, 2012

Things to Make: Sarah London's Wool-Eater Crochet Along!


If you crochet, you are probably familiar with Sarah London.  She has written some fantastic crochet patterns and books...and her use of color is FANTASTIC!  I love looking at all of her awesome pics on Pinterest!

I'm a little late coming to the Wool-Eater Crochet Along...I didn't know if I'd be able to keep up...but, I decided that even if I fell behind I'd like to make one of these amazing creations!

So...here's my progress on my very own Wool-Eater Blanket!  (I was technically four weeks late for the start of the CAL, but Sarah's said to work at your own pace...so I'm not stressing about 'catching up!)  I opted to try her new Oblong Wool-Eater pattern...


So far I LOVE the pattern...it's a bit tricky at first, but once you get going it's really pretty easy to follow!  The instructions are written in Australian/UK terms, though...so watch for that!  ;)

My blanket is measuring about 18" wide by 35" long, and I've completed 8 rows so far!  I'm using up some odd balls of yarn that i have in sort of neutral earth tones...and a hint of teal.


I love the texture and feel of the afghan...it's nice and thick...but not too bulky.


Wanna make one of your own?
CLICK HERE to go to the info page on Sarah's site!
And you can check out what others are making on the Wool-Eater Flickr Group!

Friday, February 3, 2012

Things to Make: Cupid Bow Beanie


Hey!

Just wanted to share my latest hat pattern with you all...just in time to make a cute accessory for Valentine's Day!!

I call it the Cupid Bow Beanie! ;)
The Cupid Bow Beanie  
You can buy this pattern in my Brand-Spankin' New Craftsy Pattern Store...or by clicking the "Buy Now" button in the caption to get it from Ravelry!

And, of course, if you'd rather not make your own hat and you'd like to purchase a finished hat...you can do that HERE!