Showing posts with label tutorial. Show all posts

Friday, September 15, 2017

Thing's to Make: Simple Slouch Hat


Today is Make-A-Hat Day...so I'm sharing my pattern for a Simple Crochet Slouch Hat on my site!

CLICK HERE TO GO TO THE FREE PATTERN!


Friday, March 9, 2012

Things to Make: St. Patty's Day Crafts ~ Revisited!

Well...It's just one week until St. Patrick's Day, so I thought I'd share a couple of past projects with you all to get ready for the fun!

Here's my:
Crochet Shamrock Garland Pattern
and my:
Paper Punch Leprechaun!
Enjoy!!!


Tuesday, February 14, 2012

Things to Make: Felt Happy Heart Pin


THIS TUTORIAL HAS BEEN MOVED TO MY NEW SITE, SARAHNDIPITIES.COM!

CLICK THE LINK BELOW TO GO TO THE TUTORIAL!


I also shared this fun little tutorial over at BeccaWilhite.com!

Tuesday, November 22, 2011

Pinterest Inspiration: Men's Shirt to Peasant Blouse


This week's

was inspired by...
Peasant Blouse Tutorial from madebylex.com
Isn't it so stinkin' cute???

Here's what I used:


I picked this baby up at my local thrift store for fifty cents.  The guy at the register said something like, "Wow.  This'll make a great Halloween costume, huh?"  When I told him that I was actually going to wear it, he looked at me like I was completely nuts.  Which, maybe I am, but I digress...

I loved the fun paisley pattern and the colors on this shirt...but let's face it...that collar and those cuffs.  Not so much.

And here's what I made:


Waaaaay better, don't ya' think?  Oh, yeah.

Instead of adding a cuff to the sleeves I simply added another turned under casing and elastic, to give them a loosely gathered look.

I love the way it turned out!  The tutorial was easy to understand and had great results!

If you happen to have a spare button-up shirt lying around I recommend giving this one a whirl!

Wednesday, October 12, 2011

Great Idea: Vampire Yourself!


My sisters and I are weirdos.  Really.

We love to get together and dress up in costumes and take crazy pictures of each other. 

I give you exhibit A:

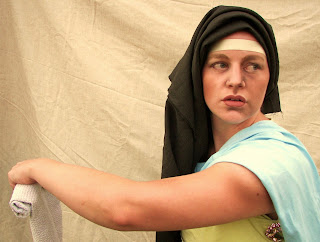
Me as the Delphic Sibyl on the Sistine chapel ceiling...really.  Here's a source pic for you to compare it to.
 And for exhibit B here's a couple from another photo shoot...these ones were based on our favorite fairy tales:
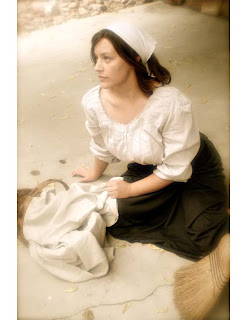
Me as Cinderella...
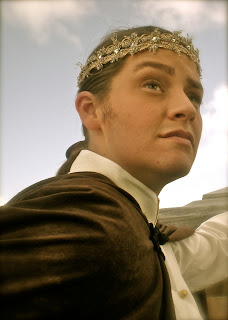
... and Prince Charming.  Yes.  That's really me.

So last year we decided it would be fun to dress up like vampires and take pictures of each other in the cemetary...'cause ya' know...that's just the natural progression of things, right?  Ahem.

I give you exhibit C

Here's a picture of me in all my Vampiric glory.  (This photo hasn't been messed with...but I am wearing colored contacts...my eyes are actually grey...)


But...

Here it is after playing around with the fun Vampire effects available on Picnik.com right now!


Cool. eh?

Her's what you have to do:

1.  Go to Picnik.com.
2.  Click "Get Started Now".
2.  Upload a picture of yourself.
3.  Using basic edits adjust the saturation, brightness, and crop your picture if desired.
4.  Using the Featured Effects do the following:
a.  Draculan Dermis: use this tool to make your skin pale (and sorta sparkley...)
b.  Vampire Eyes:  use this tool to change the color of your eyes (I used red obviously...)
5.  Go to the Effects tab and scroll down to the Focal B&W effect.  Move it around until it looks right to you!
6.  Click the Save & Share tab at the top to save your scary picture to your computer!!

Have fun with this!!

Image and video hosting by TinyPic

Tuesday, September 27, 2011

Things to Make: Refashioned Skirt to Dress Tutorial


I have this skirt.  It is made of the prettiest multi-colored cotton batik fabric.  It's loose and flowy.  I got it for $2 at a local clothing consignment shop.  And it's FRUMPY.

No really.

F. R. U. M. P. Y.

See?

Me.  Frumpy.  And just out of the shower...with no make-up on.  The ultimate before picture.

Sad, huh?

If there's anything a new mommy DOESN'T need it's to feel frumpy.  I mean I already feel frumpy enough...but add this skirt to the mix on a day when I'm supposed to be getting dressed up and looking cute?  Ugh.

So.

Someone told they saw a thing on TV where someone took a big flowy skirt and turned it into a cute dress instead.  Of course I wanted to give it a try!

Here's what I did:

Materials Needed:

Big, flowy, long drawstring skirt
Sewing machine and thread
Scissors

First I draped the skirt around my shoulders and tightened the drawstring to a comfortable neckline length.


Then I marked where I thought a good sleeve length would be...and I cut the skirt.


Next I put on the skirt/dress on and slipped my arms in the armholes.


I put it on inside out, and then I used safety pins and pinned the dress where I thought it should be taken in.


I sewed along the pins.


Then cut the excess fabric away.


I pinned the first side to the opposite side as a template; sewed and cut away the excess fabric.


I decided not to hem around the arms...I kinda like the frayed look of the fabric...so I just sewed round the armholes a couple of times, so the fraying wouldn't get out of hand!

I added a belt,  put on my make-up and and did my hair...

And voilá!

AFTER


A cute NON-FRUMPY dress made out of awesome multi-colored fabric...that I can still nurse in, thanks to the drawstring neckline!!  Plus it only took 10 minutes and cost $2!  Can't beat that!


WOOT!

Image and video hosting by TinyPic

Tuesday, August 30, 2011

Pinterest Inspiration: T-Shirt Refashion


Who out there is on Pinterest?  Who out there on Pinterest has about a BAZILLION project ideas that they're sitting on right now?

So do I.

So in an effort to not make my Pinterest obsession useless, I'm putting it to work.  My goal is to try out at least ONE PIN a month...if not more!  I'll be posting about my successes and attempts here at least once a month!

I'm starting my 
series with THIS, which I had pinned in my Things to Wear pinboard:


Easiest T-Shirt Refashion EVER - by The Naked Doll on Craftster

And here's what I came up with:


I love that I took one of my favorite comfy shirts (ie. FRUMPY and SHAPELESS), and turned it into something cute and feminine - that I can wear in public without being heinously embarrassed!  GENIUS!  And it was so simple and quick!!  Really!  You must try this!!!

Image and video hosting by TinyPic

Tuesday, July 26, 2011

Great Idea: Tutorial Round Up!


I'm not fully back in the swing of things yet, but I didn't want to leave you hanging this week without a tutorial, so I'm linking up some of my favorite how-to project posts from the last year months!

Enjoy!

Tissue Paper Cherry Blossoms


DIY Cake Stand


Repurposed T-Shirt Refashion


Hope you have a great Tuesday!!!!

Image and video hosting by TinyPic

Tuesday, July 19, 2011

Things to Make: Craft Fair Banner by Growing Up Wild!


Today's how-to is by Kelly from Growing Up Wild!  Kelly doesn't have a blog of her own, but she has a darling Etsy shop, where she sells the cutest onesies and baby shoes...seriously adorable!!

Whale One Piece!!!

Take it away, Kelly!

I was getting ready for my very first local event and felt so over-whlemed.  Creating a display for my organic baby clothes and shoes was a tough task.  I wanted to keep my table as eco friendly as possible while still catching people's attention.  I started with making a banner.  My goal was not to the printed store route as it didn't really fit with the handmade nature of my wares.  I decided to craft my own instead!

I started with two yards of eco felt (made from recycled plastic bottles) in green, purple, and gray.  They didn't have the shade of green that I wanted for the foreground, so I used fleece for that instead.  I was actually really happy with the texture that it added.  I drew my mountain forms in chalk first, and then cut.  Each layer was glued to the background starting with the purple.


I wanted my letters to stand out so I decided to use a font with a shadow.  
I printed my letters on the computer.  

I first cut the letter with the shadow form out of white felt.  


After trimming off the shadow, I cut the remaining letter with brown felt.  Glued together, this gave my letters an extra dimension.


Next I cut the sun out of fabric and glued it into place.  I arranged and rearranged the letters and footprints until I was satisfied, before gluing it all down. 


In order to hang my banner I created loops at the corners.  I took a 5 x 3 inch rectangle of blur felt and folded it in thirds.  This made a 5 x 1 inch rectangle that I then looped around the front and back side of each corner before stitching it into place.  (Be sure to reinforce these to hold up to the wind!)

I was so happy with my banner that I decided to use it for my Etsy avatar as well!  I am not very "techy", so I had been having the hardest time creating an avatar using programs.  Crafting with raw materials was much more my speed!  To create my avatar and shop banner, I simply took a picture in natural lighting.  I then cropped the image and used the dropper tool in each color section to read the color and then paint bucket to fill it.  It took about five minutes!  (This has also become the new label for my burp clothes!)
 

While my banner may not have the professional look of some, it definitely stands out at markets and fairs!  I have had a number of fellow sellers come ask me where to find one!!


Thanks so much Kelly!!!  I know I'm inspired to make a banner for myself, now!!

Image and video hosting by TinyPic