Saturday, May 28, 2011

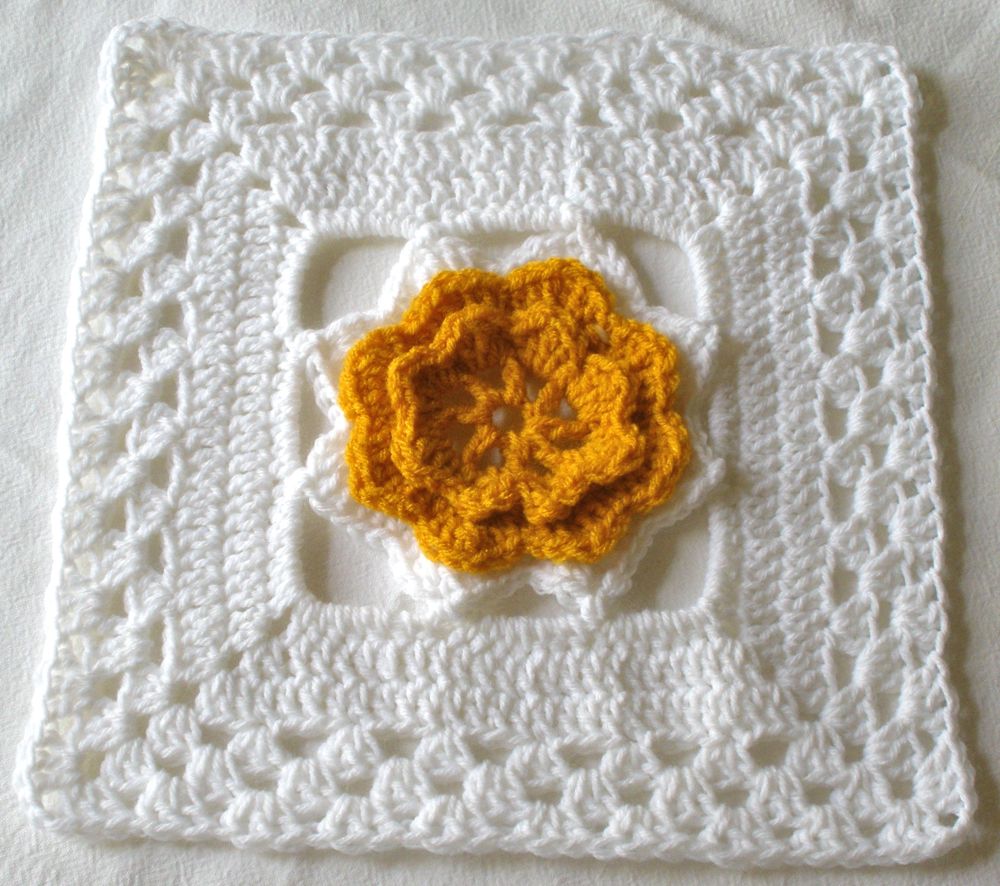
Things to Make: A Square A Day in May Week 3 ~ Blocks 16-22

Here's update number 2 on my "Square A Day" progress! 

Here are the squares I made for the third week of the Square A Day event, happening at Hooked on Handmade!  All patterns are available for free on Ravelry!

The square for Day 16 is called Falling Star, and the pattern can be found HERE!

I love how this one turned out!  The star pattern in the center is so pretty!

The square for Day 17 is called Framed Flower, and the pattern can be found HERE

This one was kinda fun to make!  It used a couple of different techniques that I wasn't familiar with...but I liked the effect a lot!

The square for Day 18 is called Flowery Square, and the pattern can be found HERE

This one was really fun!  I love the texture of the flower and the other stitches used!  I will definitely be making this one again!

The square for Day 19 is called Grandma's Heart Square, and the pattern can be found HERE

This one was trickier...the pattern was written in UK terms...so it wasn't what I was used to, but I figured it out eventually!!

The square for Day 20 is called Multi-Color Flower, and the pattern can be found HERE

The square for Day 21 is called Violet Crochet Square, and the pattern can be found HERE

The square for Day 22 is called More V's Please, and the pattern can be found HERE

Image and video hosting by TinyPic

Friday, May 27, 2011

What's New: More Matryoshkas!


One of the items I've created for the Scandinavian Festival Craft Fair I'm attending tomorrow, are some more cute little Matryoshka Dolls!

Although these little sweeties aren't exactly Scandinavian per se, they give that same folksy feel that I always get when I go to events like this!

Here are my latest little ladies!

Each one is hand stitched and embroidered from start to finish, with little flower motifs!

Black Babushka with Hot Pink Dress

Baby Blue Babushka
with Denim Blue Dress
Soft Pink Babushka
with Dark Pink Dress

Turquoise Babushka
with Sage Green Dress

Kelly Green Babushka
with Turquoise Dress
I love how each doll has it's own personality...Maybe I should give them each names?  Katerina, Anya, Natasha, Sonya, Anastasia?  What do you think?


I'll definitely be making more of these...they're so fun!  And I'll be getting a listing up in in my shop sometime soon!  I'm also trying to figure how to make these into a pattern so others can make them, too!!


Have a great weekend, Everyone!!

Image and video hosting by TinyPic

Wednesday, May 25, 2011

Things to Make: A Square A Day in May Week 2 ~ Blocks 9-15


You may have thought that I'd given up on this project...but I haven't!!  I just hadn't had time to take pics all of my new squares!!  So I decided to post all of the squares for the remaining weeks at the same time!

Here are the squares I made for the second week of the Square A Day event, happening at Hooked on Handmade!  All patterns are available for free on Ravelry!

The square for Day 9 is called Falling Star, and the pattern can be found HERE!


I love how this one turned out!  The star pattern in the center is so pretty! And fun picot detail is so interesting!  Loved it!

The square for Day 10 is called Framed Flower, and the pattern can be found HERE


This one was kinda fun to make!  It used a couple of different techniques that I wasn't familiar with...but I liked the effect a lot!  Unfortunately, it appears that only some of my puff stitches are staying puffed...hmmmm.

The square for Day 11 is called Flowery Square, and the pattern can be found HERE


This one was really fun!  I love the texture of the flower and the other stitches used!  I will definitely be making this one again!  It sort of reminds me of a lilly-pad or something!  Cute!

The square for Day 12 is called Grandma's Heart Square, and the pattern can be found HERE


This one was trickier...the pattern was written in UK terms...so it wasn't what I was used to, but I figured it out eventually!!  I debated on whether I should do the edging around the heart on this one, opted to leave it off...but I may change my mind again!

The square for Day 13 is called Multi-Color Flower, and the pattern can be found HERE


This is another really beautiful layered flower.  I love the way the petals overlap on this one!  and the edging around the flower is so dainty and pretty!

The square for Day 14 is called Violet Crochet Square, and the pattern can be found HERE


I loved the starburst center of this one, and interesting edging.  I adjusted the last couple of rows, because the way the pattern was written didn't make sense to me there...This one definitely will need some blocking, though!!

The square for Day 15 is called More V's Please, and the pattern can be found HERE


This was on of my favorites so far!  I loved the center shape, and the V stitches around the edge!  So fun and fast!!  I can't wait to try this one in different colors!

Well...there you have it!  Week #2 of A Square A Day in May complete!!  Hopefully, I'll get a chance to take pics and post them for Week #3 before  the end of this week!!

Image and video hosting by TinyPic

Tuesday, May 24, 2011

Great Idea: Over-Scheduling 101

{The Twitterpated Toad}

Today's How-To is a lesson in how to Over-Schedule yourself, given in 43 easy-to-follow steps:


First of all, you need to remember that the very most important rule of over-scheduling is that you must learn to say "YES" to everything asked of you or even suggested. ***


1.  Agree to help decorate the set for the Elementary school play, the day before the performance.

2.  Also agree to design and print off the iron-on transfers for the cub scout day camp, so they can make their shirts tomorrow at scouts.

3.  Make sure that your kids make it to call-backs for the community theatre production they auditioned for on Saturday.

4.  They also need to be to the dress rehearsal for the afor-mentioned school play, after the call-backs.

5.  Fix, wash and get costumes ready for the play, too.

6.  Now you can relax and finish up the orders that you got over the weekend from your business.

7.  In addition to regular morning chores, and taking care of your two kids who are not in school, the next morning run to store to get a new color ink cartridge for your printer so that you can actually print off the iron-on transfers for the afor-mentioned scout shirts.

8.  Print off the transfers.

9.  Run to the school before the assembly performance of the school play so that your kids have all of their props...and the part of the costume they forgot to stick in their backpack.

10.  Go back to the school to pick the kids up and make sure that your son makes it to Cub Scouts so that he can make his Day Camp shirt...and don't forget to leave the transfers with the Den Mother.

11.  You also need to stop at the post office and drop the orders in the mail to be shipped.

12.  Get dinner made early so that you can hurry to the school...after picking up your son...and save some seats for the school play performance.

13.  Don't forget to charge the batteries on the camcorder and camera!

14.  After the play, stay after to help un-decorate the set and clean up the school gym.

15.  The next morning get kids ready for school field day.

16.  After dropping them off, run home and throw a load of laundry in the washing machine.

17.  Go back to the school at 9:30 so you can register your 5-year-old for Kindergarten.

18.  Don't forget the immunization records and birth certificate.

19.  At 10:30 get back in the car and drive half an hour to your 37 week maternity check-up with your doctor...you still have the two youngest kids with you...unless you were able to find a generous person to watch them for you!

20.  Come home (picking up the kids on the way, of course), and throw the laundry in the dryer.

21.  Try to put tags on the items you've finished up for the craft fair you are attending on Saturday.

22.  After school, take your oldest daughter to her Activity Days meeting at 4:00.

23.  Pick her up at 5:30.

23.  Finish getting dinner ready so your hubby has something to eat before he leaves to go to scouts, since he's the Scoutmaster in your neighborhood.

24.  Throw the laundry in a pile on the chest in the living room, and hope that you have time to fold it before the three-year-old gets to it first.

25.  Bake a cake for your friends' daughters' birthday...which you agreed to help out with.  

26.  After letting it cool, stick in the freezer for tomorrow.

27.  Turn on movie after movie for your children to watch as you spend the day finishing up items for the craft fair, putting tags on things, and generally ignoring your family, while you frantically try to get everything together for Saturday.

28.  Last day of school.

29. Take kids to school....come back at 9:30 for the awards assembly.

30.  Come home and give your kids mac 'n' cheese for lunch.

31.  Mix -up frosting...try to keep the three-year-old away from it for 15 minutes.

32.  Take the previously baked cake out of the freezer and frost it...again, try to keep the three-year-old away from it for 15 minutes.

32.  Get everyone loaded in the car and drive an hour to the birthday party.

33.  Forget the present at home and make a stop at the store to get another.

34.  Finish decorating cake at friends' house, and help get everything else ready.

35.  Have fun at the party!

36.  Stay a little too long to help clean-up afterward, because you love your friend.

37.  Drive home and fall into bed....and then don't sleep because you're trying to remember if you got everything done for the craft fair.

38.  Wake up way too early and load up that car with everything for the craft fair.  

39.  Get dressed cute and business-like...so you'll make a good impression on potential customers!

40.  Set up the table, canopy (because it's supposed to rain, of course), and all of your wares by 9:00 am.

41.  Spend a fabulous day at the fair, while you let your hubby take care of the kids!

42.  Clean-up stuff, take inventory, and head home.

43.  Sit on the couch and be thankful that next week doesn't look like this.


There you have it.  So simple.  So foolproof.  Over-scheduling is as easy as "1" - "2" - "43!"

You can, of course, use these steps as guideline in your own life...just add any other items to your itinerary that you feel are necessary!

I'd love to get your feedback on this highly important phase of woman/motherhood.

How do you plan on implementing the art of over-scheduling into your own life?


Image and video hosting by TinyPic


P.S.  I  REALLY hope none of you take this seriously, and aren't offended by my complete tongue-in-cheek post!

I sooo know that we as women tend to be natural over-schedulers...and as I looked at my calendar for this week, I just laughed.  I'm grateful to have a sense of humor about this right now...I've been feeling like a failure to my family in so many ways lately...but I realized that so many of the 'things' I do are FOR my family.

But.  I need to let myself have some breathing room, too.  

***It's okay to say "NO" if you really don't have the time.  People will understand.  Your kids will understand.  They just want you to be happy, too.

One thing I've learned is that an over-scheduled mom is a cranky mom.

So.

Enjoy your week.  If it's as crazy as mine is, hang in there!  Have fun with life!  

And say "NO" when you need to!

Friday, May 20, 2011

Great Idea: Sailboat Onesie and Cap


This week (and for the next couple of weeks!) I'm going to be featuring items I've made...but haven't blogged about yet...on Fridays!

This week I'm featuring a cute little embellished onesie and cap that I made for my sweet cousin, not too long ago!

I made this for a shower gift for my cousin, who just had her baby - a boy - just last week!  This is her first baby, and I wanted to make something fun and useful...and without spending anything!  I'm on a "use-up-all-the-stuff-that's-mucking-up-the-craft-room-before-you-even-think-about-getting-anything-else" kick lately.  I'm loving what I've been creating!!

I decided to try my hand at an applique (there are soooooooo many super cute embellished onesies out there right now!)...but I sorta wimped out, and ended up using felt instead of "real" fabric.  (Any of you who have done this...share your tips!)

I found a onesie from my craft stash, some small scraps of felt, my hot glue gun, embroidery floss, and some baby yarn, and got to work!  (Yup.  I keep weird things like brand-new onesies in my craft stash.  Doesn't everyone?)

I cute out the shapes for my little boat and waves, and held them in place n the shirt with a tiny dab of glue.  Then I just embroidered/stitched around the edges of with embroidery floss!

I think it turned out really cute!


To go with the onesie I crocheted a teeny little brimmed beanie out of baby blue yarn!


This was a fun project...and I think I'll give it another try sometime!


Hope you have a great weekend!!


Image and video hosting by TinyPic

Wednesday, May 18, 2011

What's New: Crochet Newsboy and Flapper Hat Patterns!


I've had lots of requests to the patterns I've used for some of my hats and other projects written up, and I'm happy to announce that I finally got to writing some of them out this past week!  After some testing and adjusting, they're done!!

I've now listed my patterns for The Flip Flapper and The Newsie in both my Etsy shop and on Ravelry!  Each of the patterns also comes with the pattern for the coordinating flowers (a 5-petal Layered Posie and the Button-On Bloom), shown in the pictures!  (I'm also planning on listing these patterns separately in my shop soon!)

Here's The Newsie:

The Newsie - PDF Pattern - Crocheted Newsboy Hat
And here's The Flip Flapper:
The Flip Flapper - PDF Pattern - Crocheted Flapper Hat

If you'd like to see my listings, just click the link in the caption of the pictures!

These patterns are for adult/teen sizes...but I'm working on getting children's/baby sizes written up as well! I'm pleased with how they turned out!

(And if you are not up to making a hat for yourself, I do have both of these listed in my shop as finished hats, too!  Here's the listing for The Newsie, and here's the one for The Flip Flapper!)

I'm also writing up a pattern for the Crocheted Caplet I made and for my Button Blossoms...so stay tuned!

Soooo....What's new with you this week?

Image and video hosting by TinyPic

Tuesday, May 17, 2011

Things to Make: Skirt and Scraps into Child's Apron!


This year one of my girls' asked for an Easy-Bake Oven for her birthday!  I found a screamin' deal on a brand new one on Craig's List, and wanted to add something extra to make the gift a little more special!

I went through my fabric stash and pulled out a couple of things, and then had my daughter choose what she liked best!  (She had no idea what I was making with the fabric...which made it even more fun for me!)

She picked out an old orange handmade skirt.  The other supplies were from various other projects:  a ton of eyelet lace, grosgrain ribbon, and a scrap of fabric.

(First off, I should remind you that I am a LAZY seamstress...I cut corners and do things fast.... so be prepared.)

I started out by cutting the side seams of the skirt away.  I wanted the apron to be a double layer of fabric, for more durability,  so I used both sides of the skirt.

Next, I folded over the top edges of the skirt and ironed them flat.

I used another apron as a template and cut out the 'armhole' shapes.


Next I cut four lengths of ribbon for the neck and waist ties,

and then pinned them to the right side of the apron, and basted them into place.


Next, I pinned the other half of the skirt/apron to the first, with right sides facing, and stitched the two together, leaving the bottom edge open for turning.

After I turned the apron right-side-out (and removed the extra pins, of course), I pinned the eyelet to the bottom hem.  (I gathered the eyelet a little to make it ruffle.)  Then I top-stitched the two the pieces together.


Next I took my contrasting scrap of fabric, and cut out a pocket shape...I wanted this to be double thick, too, so I cut an extra long rectangle out, and folded it in half.

I folded down the top edge, ironed it flat, and then stitched a piece of eyelet to the back side of the finished edge.


Next I folded the pocket together with right sides facing and pinned/stitched it together, leaving the top open.  After turning the pocket right-side-out, and ironing it flat, I pinned it and top-stitched the top together just below the lace.


Next I pinned the pocket to the front of the apron, and top-stitched around the sides and bottom.

Whew!

And here's the finished apron!!!

(I also made a matching hotpad, out of the rest of the scrap fabric...but forgot to take pictures of that process...Sorry!)

The very best part of this project was that I didn't spend a dime!!! (Well, ok.  Technically I'm sure I spent a little money on some of the supplies at some point...but if ,my memory serves me right, all the fabric was from the remnant rack about five years ago, the lace was a hand-me-down, and the ribbon was from the dollar store years ago!)

I love it when I can turn something old into something new and useful, don't you!?!


I'm loving spending time with my newest little kitchen helper!

Image and video hosting by TinyPic