Friday, September 24, 2010

Feature Friday: janedean


This week's Friday Finds Feature is Heather Dean, of janedean on Etsy. She also has an independent website, you can visit here.


I came across her shop, because my lovely sister, Amanda (who was featured in this post), told me I HAD to see this amazing stuff! I love that she uses old things and makes them new! What a great way to recycle things that most people would trash, and turn them into beautiful treasures!


Heather uses found objects, old jewelry, and recycled items to make the most amazing jewelry and magnets you've ever seen! They're simply gorgeous!


Here's a little bit about her from her profile on Etsy:

"...My business is named after my grandmother Jane Dean, a woman who loved jewelry and accessories.

I love to recycle! Most of my designs are made with salvaged vintage components. I especially like using broken and damaged parts that are destined for the trash. I enjoy the challenge of turning old unwanted things into new pieces that people will enjoy wearing or displaying in their home. I have been selling my handmade designs online since 2002.

I studied jewelry design in school, as well as sculpture, printmaking, drawing and painting before earning a degree in art history from UCLA. I also have an extensive retail background that includes sales, management and visual merchandising.


She also has a supply shop on Etsy, which you can visit by clicking here.

Image and video hosting by TinyPic

Tuesday, September 21, 2010

Things to Make: Repurposed T-Shirt Dress #2


This week I'm going to show you how I turned a couple of clearance rack T-shirts into a cute dress for my 4-year-old!

Her favorite color is green...and I'm taking any color of green: Kelly green, mint green, spring green, grass green, kiwi green...you name it! In fact I think maybe the reason why she likes avocados so much is because of the color! (PS- Did you know that the human eye can see more shades of green than any other color? I know. Cool, eh?)

She also love dresses...and leggings. It's her 'uniform'. Every morning she wakes up and wants to wear a dress. Which can be a little difficult, because most of her hand-me-down clothes form her older sister are not dresses. My oldest also enjoyed wearing dresses some of the time...but her style is a little more sporty, ya' know: t-shirt, jogging pants, etc.

I have been looking everywhere for 'play' dresses for my two little girls. And when I suddenly discovered the idea of repurposing T-shirts I totally scored! I've been creating new-from-old clothing like a woman possessed! When I found these shirts on clearance at Wal-mart (for only $1.50 each) I snatched them up!

The shirts are both girls' sizes. The one underneath is a 10-12; the one on top is a 6x.


I started by cutting the top half of the larger shirt off. (I'll be showing what I did with that half next week!)I also cut a couple of narrow strips off the top of that...and also cut about 3" off the bottom edge.


Next I gathered the top (cut) edge of the shirt, and the top (cut) edge of the 4" strip, on my sewing machine, and pinned them first together, and then to the bottom of the smaller shirt. I then sewed them into place with a top stitch.


I next took on of the narrow strips, cut it so it was no longer a large tube shape, and gathered
the center with my sewing machine.


Then I stitched the gathered belt onto the front center of the dress. (Sorry! I forgot to take a picture of that!)

I cut the other narrow strip into two pieces, gathered them down the center, folded them in half, and rolled them up. (This is a technique I learned from this site.) I stitched the folded and rolled edge together into cute little rosettes. I hot-glued one to a clip I already had.


Lilly helped me dig through my button tin and found all the green ones for me! She really wanted to put buttons all over it, but I convinced her to let me put them just on the collar! I also added one of the rosettes!


Here is the finished dress!


So cute! She loves it!


Check in next week to see what I did with the other half of the shirt!

Image and video hosting by TinyPic

Friday, September 17, 2010

Feature Friday: Amanda J Photos & ArtisanMaskers


So, this week's Friday Finds, is a shout out to my lovely sister, Amanda! (I know....sometimes you just gotta brag on the ones you love!)

Not only is she a wonderful Mom of three, but she also has TWO Etsy shops! Crazy lady! ;)

Her first shop, amandajphotos, has been dedicated to her photography, which is absolutely beautiful I might add. She still does things the old-fashioned way...ya' know with real film...so her photographs are stunning! I have an original of this one


hanging in my front room...I LOVE it! It's so peaceful...whenever I'm feeling really stressed I just sit and look at it, and life seems so much better! In addition to prints of the photos she also offers bookmarks and cards!

Recently she's begun adding vintage items, and fun eco-destash items like this and this! So very cool! I picked up some of her stripped sheets, and can't wait to get started on a new bath mat! Very cool!

Her other shop, Artisan Maskers, is dedicated to paper mache masks like these:


I know. They're so awesome.

The best part is that most of the masks are made from salvaged and upcycled items! Each mask is hand made from scraps of paper...such a pretty way to recycle!! She has this fantastic stash of stuff to decorate with and mostly its just odds and ends that someone else didn't want! She's put together a group of crafters who all contribute to the site...each Mask is totally unique, because of the upcycled nature of the decorative items, and also because of the different crafters' techniques and styles.

She's had masks sold for Halloween, Mardi Gras, New Year's Eve, and even Prom! If you're looking for a truly unique costume piece, you really should check out her shop!


Image and video hosting by TinyPic

Tuesday, September 14, 2010

Things to Make: Easy Peasy Topiaries


Earlier this summer I found three of these fantastic green styrofoam topiaries at a yard sale. They were about 2 feet tall, and had some bedraggled greenery and berries poking out of them, but they were each only marked with a $1 sticker...which would have been a great deal, since at the craft store these babies can cost up to $14.99 each! (I know...I looked.)

When I took my finds to be purchased, however, they gave me all three for just $1! I know...a steal! Unfortunately, I don't have any BEFORE pictures.... Sorry! But you can still get the idea of the process I used to transform them!

So....here's what I did:

I took a can of spray adhesive (my favorite is 3M, pictured below), and sprayed the top ball all over. Make sure that when you do this you use gloves...or that you don't care of you get sticky! This stuff is impossible to get off of your skin right away, unless you have Fast Orange Hand Cleaner!


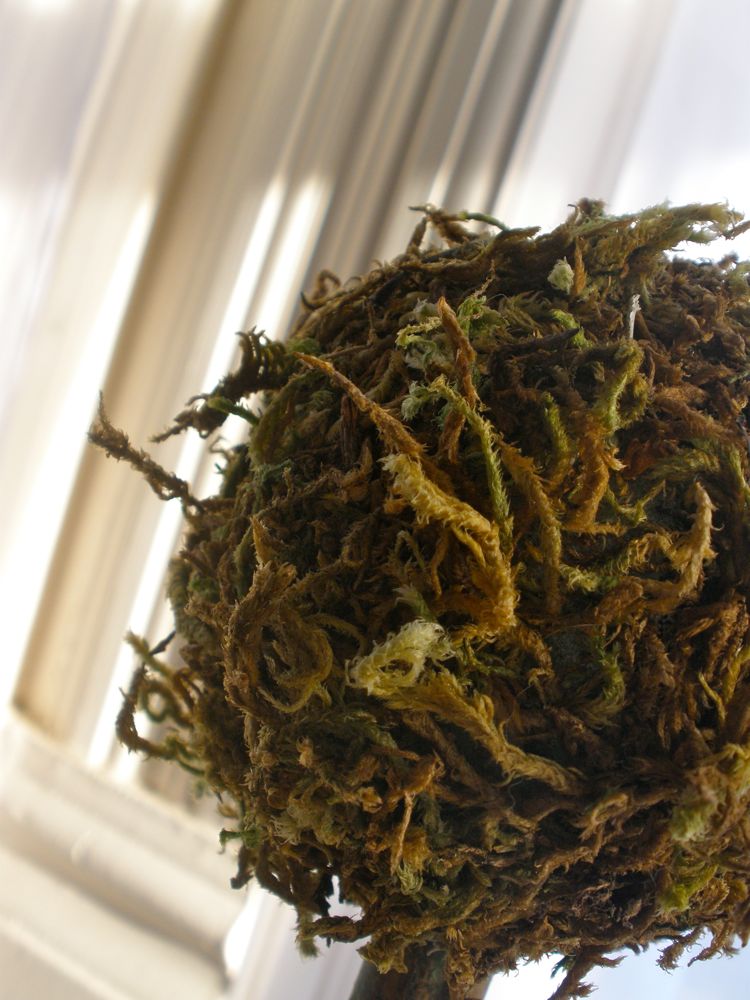
I held the topiary over a tray, and then took a bag of decorative moss (which I had purchased from the dollar store...I know...I rock), and dumped it over the ball. After I shook it off a little, I smooshed the moss down onto the adhesive so that it wouldn't look so 'hairy'.


I then repeated the process with each of the other surfaces, including the top of the base. Here's what it looks like!


After I allowed them to dry overnight (You wouldn't want them to stick permanently to anything valuable!), I put them in these wonderful vintage ceramic pots! (Um...sorry...you probably won't be able to find anything this awesome to put your own topiaries into...unless you find a killer deal at a yard sale! Happy hunting!)


I've had these beautiful pots for several years now. They are so pretty! The colors and glazing are amazing! They were my husband's grandmother's, and I got them after she passed away... which just adds to their charm, for me! I know absolutely nothing about them...except that I LOVE them!


The finished project!


I've always been sad that I didn't have a way (or a place) to show off my pretty pots...but now that I've made these fun topiaries and we live in a charming victorian home, and I have this gorgeous mantelplace to put them on! (Too bad the lighting in the parlor isn't the greatest! It really looks amazing in real life!)


This project was SUPER EASY! These only cost me $2 to make, and only took about 30 minutes! The hardest part was waiting for the adhesive to dry thoroughly! I highly recommend giving it a try!

Image and video hosting by TinyPic

Thursday, September 9, 2010

What's New: Three Sisters


One of my favorite folk songs goes:

"There were three sisters, side-by-side;
Sing aye-day, sing aye-dum..."


It's always had a special place in my heart, as I am the oldest of three sisters myself, but especially as I've had three little girls of my own!

These cute little Matryoshka Dolls came about because I was experimenting with the idea of using sawdust as a stuffing for 'toys'. (We happen to have A LOT of sawdust lying around right now, because of our fence-building project...and as you all know, I hate to let anything go to waste!)

I decided to try my hand at creating a felt doll in the shape of a traditional Matryoshka doll, as the shape lends itself very well to this sort of thing! If you don't know what a Matryoshka is, click here, to find out more them. Obviously these don't open up...but they do have the look of a traditional Matryoshka doll.

Anyway, as I experimented I found that the felt was too porous for the sawdust filling.(Ah, well...I guess the sawdust will just go into out compost pile!)

I didn't want to abandon my creations, though, so I decided I'd finish them up with polyester fiberfil, instead! Each doll is made from simple acrylic felt which is hand stitched with embroidery floss; then stuffed and stitched closed! The embroidery was done before the doll was stitched together...and I decided to make each one 'look' like one of my girls, so they each have different coloring and personalities! A special thanks goes to my Aunt Linda who taught me how to do a Lazy Daisy stitch, a French Knot, and a Blanket Stitch!

The girls love them...especially my youngest who keeps wrapping up all the 'babies' and carrying them all over the house!


I'm going to develop a simplified pattern that I will sell in my Etsy shop...maybe with diminishing sizes of dolls...so keep looking for that new item! I want to have it up before Christmas time...I can just see a whole bevy of 'sisters' in christmas colors sitting on the mantel!


P.S. This project is entered in this fun contest! Go check it out!


Image and video hosting by TinyPic